


")


Introduction to Scone-Making 🌟
Hello, baking enthusiasts! Today, we embark on a delightful journey into the world of scones. Scones, a beloved treat, are perfect for breakfast, tea time, or a snack. Our recipe today promises to be easy, fun, and rewarding. Let’s start our baking adventure together!
Ingredients: The Foundation of Delicious Scones 🛒
To create our mouth-watering scones, you will need the following ingredients:
- All-Purpose Flour – 3 cups: The base of our scones.
- Granulated Sugar – 1/3 cup: For a touch of sweetness.
- Baking Powder – 5 tsp: This helps our scones rise.
- Salt – 1/2 tsp: Balances the flavors.
- Unsalted Butter – 3/4 cup, cold and cubed: Adds richness.
- Heavy Cream – 1 cup: For moisture and tender texture.
- Egg – 1 large: Binds the ingredients together.
- Vanilla Extract – 1 tsp: Enhances flavor.
- Optional Add-ins (chocolate chips, dried fruit, nuts): Personalize your scones!
Equipment Needed: Tools for the Perfect Scone 🍴
- Large Mixing Bowl
- Measuring Cups and Spoons
- Pastry Cutter or Fork
- Baking Sheet
- Parchment Paper
- Oven
Preparing to Bake: Setting the Stage 🌈
- Preheat Your Oven: Start by heating your oven to 400°F (200°C). This ensures a consistent baking temperature.
- Line Your Baking Sheet: Place parchment paper on your baking sheet. This prevents sticking and eases cleanup.
- Measuring Ingredients: Accurately measure each ingredient. Precise measurements are key to baking success.
Making the Dough: The Heart of the Scone 🌟
- Combine Dry Ingredients: In your large bowl, whisk together flour, sugar, baking powder, and salt.
- Add Butter: Add the cubed butter. Use your pastry cutter or fork to blend it into the dry ingredients until the mixture resembles coarse crumbs.
- Wet Ingredients: In a separate bowl, whisk together the heavy cream, egg, and vanilla extract.
- Combine Wet and Dry: Pour the wet mixture into the dry ingredients. Mix until just combined. Avoid overmixing to ensure tender scones.
- Add Optional Ingredients: If using, gently fold in your chosen add-ins (chocolate chips, dried fruit, nuts).
Shaping and Baking: Bringing Scones to Life 🌈
- Shape the Dough: Turn the dough onto a floured surface. Gently pat it into a round disc, about 1 inch thick.
- Cut the Scones: Use a knife to cut the dough into 8 equal wedges.
- Place on Baking Sheet: Arrange the scones on the prepared baking sheet, leaving space between each.
- Bake: Bake in the preheated oven for 20-25 minutes or until golden brown.
- Cooling: Let the scones cool on the baking sheet for a few minutes, then transfer them to a wire rack.
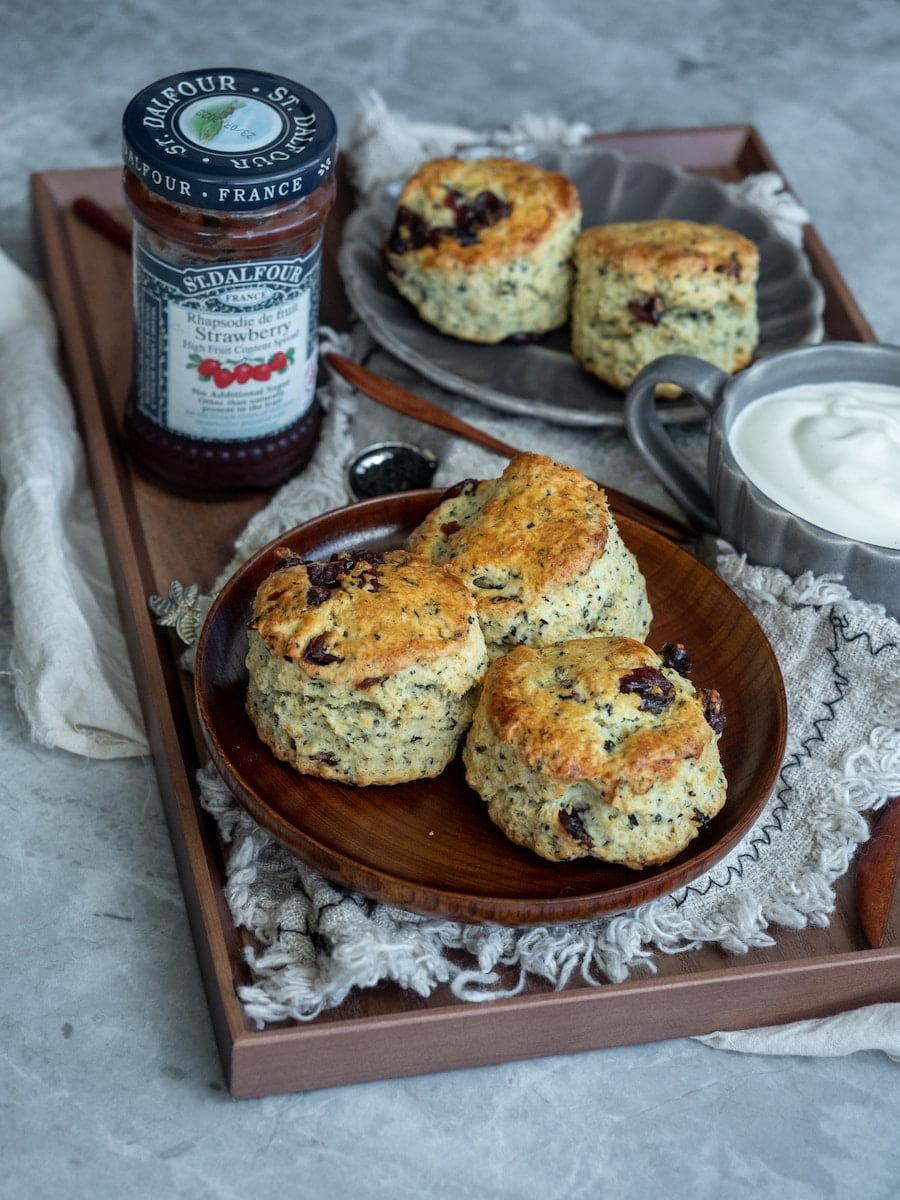
Serving and Enjoying: The Finale of Our Scone Saga 🎉
Serve your freshly baked scones warm with butter, jam, or clotted cream. Pair them with your favorite tea or coffee for a delightful treat.
Conclusion: Reflecting on Our Baking Journey 🌟
Congratulations! You’ve just created delicious homemade scones. This recipe is not only easy but also versatile. Feel free to experiment with different add-ins and flavors in the future.
FAQ: Answering Your Scone Questions 🤔
Q: Can I make these scones gluten-free? A: Yes, use a gluten-free flour blend in place of all-purpose flour.
Q: How do I store leftover scones? A: Store them in an airtight container at room temperature for up to 2 days or in the refrigerator for up to a week.
Q: Can I freeze these scones? A: Absolutely! Freeze them in a sealed container for up to 3 months. Reheat in the oven before serving.
Share Your Scone Stories! 📢
I’d love to hear about your scone-making experiences! Share your stories, tips, or questions in the comments below. Happy Baking! 🎂👩🍳👨🍳